I did a little make over on Miss V's lamp. It started out yellow with white polka dots. It is now RustOleum Key Lime.
I do want to pick up a plain new paper shade and some brown pom pom trim.
Wednesday, March 16, 2011
Friday, March 11, 2011
Luau Goody Bags
I just assembled a sample goody bag for Miss V's Luau party.
This is what when in them:
One wrapped Hershey Bar
1 mini hibiscus print beach ball
1 hisbiscus note pad
1 tropical pencil
1 bottle of bubbles
1 hibiscus print fan
2 tropical tattoos (may add another one or two)
2 tropical silly bands (may add another one)
All of the above is from Oriental Trading, except the wrapped Hershey bar. The bags are perfect size. They are 6x6. It had some bad reviews, but you really need to read the description. If you still aren't sure, measure it out on paper to see if it fits your ideal size.
I am also going to throw in some packages of tropical fruit gummy candy.
I printed out the Hawiian name tags on photo paper. I sized them down to 3.5 x 3.5 and they look perfect! I punched a small hole in the corner and attached it with curling ribbon.
This is what when in them:
One wrapped Hershey Bar
1 mini hibiscus print beach ball
1 hisbiscus note pad
1 tropical pencil
1 bottle of bubbles
1 hibiscus print fan
2 tropical tattoos (may add another one or two)
2 tropical silly bands (may add another one)
All of the above is from Oriental Trading, except the wrapped Hershey bar. The bags are perfect size. They are 6x6. It had some bad reviews, but you really need to read the description. If you still aren't sure, measure it out on paper to see if it fits your ideal size.
I am also going to throw in some packages of tropical fruit gummy candy.
I printed out the Hawiian name tags on photo paper. I sized them down to 3.5 x 3.5 and they look perfect! I punched a small hole in the corner and attached it with curling ribbon.
Wednesday, March 9, 2011
Luau Party Plans
It is well known in my circle of friends and family that I am pretty decent party planner. I like to plan a party down to the smallest detail.
My daughter (aka Miss V) decided on a tropical luau theme for her family/neighborhood friend birthday party.
I like to put my ideas into a word doc and go from there. Here is what we have planned for her luau party this year.
Food:
Chicken Teriyaki on a stick
Pineapple cubes
Macadamia nuts
Gold Fish Crackers (different kinds)
Drinks: Kid Friendly Pina Coladas, strawberry daiquiris, and a few other flavors (depending on what the store has), bottled water
Trail Mix
She will have flip flops for her cake and some Bikini Beach Cupcakes, the idea came from Bakerella.
Limbo
Beach attire relay: (can find the supplies at the dollar store or Goodwill)
Two chairs
Two big beach bags
2 large pair of sunglasses
2 large shirts
2 large shorts
2 leis
2 large sun hats
Make two teams. Place one set of items in each bag. Place on a beach chair. Have teams, one person at a time, from each team run to the chair and put on the items. When that child is dressed, he/she must run back to his/her team and undress and put everything back in the beach bag and run the bag back to the chair. Place the bag in the chair and run back and the next child in line goes until everyone is done.
Sand Bucket Toss: (can find supplies at the dollar store)
Players use a beach shovel to toss ping pong balls into a bucket from a few feet away. Or make it into a relay.
Beach Ball Pass
Teammates take turns running to the finish line and back while batting a beach ball in the air…
Hula Hoop "Head" Off (need to purchase two at Walmart or Target)
Be the first team to pass a hula hoop down the line while holding hands…
Pass the coconut
Play the classic game of "hot potato", but with a coconut. The players sit in a circle with one player holding a coconut. The music (a Hawaiian tune or music from the Lilo and Stitch soundtrack) begins and the coconut is passed around the circle until the music stops. The player holding the coconut when the music stops is out. The music begins again and the playing continues until there is only one player left.
Coconut Bowling
if you have a backyard or driveway, you can put up a coconut bowling alley. Just put up empty tins or empty plastic water bottles and have the kids take turns knocking them down with real coconuts.
No party can be complete without themed music. Of course I have tons of Jimmy Buffett music but I also found Hawiian Luau party music and Vintage Hwaiian Music. I also downloaded Little Brown Gal. We found a series of videos on how to hula to Little Brown Gal.
For the goodie bags, I mostly get the supplies at Oriental Trading. This year I made little name labels with each childs name in Hawaiian. I found all sorts of cool phrases on Aloha Friends Luau site.
I used a Tropical theme digital scrapbook kit from Gotta Pixel. I used it to design the invitations, goodie bag labels and I also came up with a rough draft of a drink (inu) menu.
My daughter (aka Miss V) decided on a tropical luau theme for her family/neighborhood friend birthday party.
I like to put my ideas into a word doc and go from there. Here is what we have planned for her luau party this year.
Food:
Chicken Teriyaki on a stick
Pineapple cubes
Macadamia nuts
Gold Fish Crackers (different kinds)
Drinks: Kid Friendly Pina Coladas, strawberry daiquiris, and a few other flavors (depending on what the store has), bottled water
Trail Mix
She will have flip flops for her cake and some Bikini Beach Cupcakes, the idea came from Bakerella.
Limbo
Beach attire relay: (can find the supplies at the dollar store or Goodwill)
Two chairs
Two big beach bags
2 large pair of sunglasses
2 large shirts
2 large shorts
2 leis
2 large sun hats
Make two teams. Place one set of items in each bag. Place on a beach chair. Have teams, one person at a time, from each team run to the chair and put on the items. When that child is dressed, he/she must run back to his/her team and undress and put everything back in the beach bag and run the bag back to the chair. Place the bag in the chair and run back and the next child in line goes until everyone is done.
Sand Bucket Toss: (can find supplies at the dollar store)
Players use a beach shovel to toss ping pong balls into a bucket from a few feet away. Or make it into a relay.
Beach Ball Pass
Teammates take turns running to the finish line and back while batting a beach ball in the air…
Hula Hoop "Head" Off (need to purchase two at Walmart or Target)
Be the first team to pass a hula hoop down the line while holding hands…
Pass the coconut
Play the classic game of "hot potato", but with a coconut. The players sit in a circle with one player holding a coconut. The music (a Hawaiian tune or music from the Lilo and Stitch soundtrack) begins and the coconut is passed around the circle until the music stops. The player holding the coconut when the music stops is out. The music begins again and the playing continues until there is only one player left.
Coconut Bowling
if you have a backyard or driveway, you can put up a coconut bowling alley. Just put up empty tins or empty plastic water bottles and have the kids take turns knocking them down with real coconuts.
No party can be complete without themed music. Of course I have tons of Jimmy Buffett music but I also found Hawiian Luau party music and Vintage Hwaiian Music. I also downloaded Little Brown Gal. We found a series of videos on how to hula to Little Brown Gal.
For the goodie bags, I mostly get the supplies at Oriental Trading. This year I made little name labels with each childs name in Hawaiian. I found all sorts of cool phrases on Aloha Friends Luau site.
I used a Tropical theme digital scrapbook kit from Gotta Pixel. I used it to design the invitations, goodie bag labels and I also came up with a rough draft of a drink (inu) menu.
My husband and I will be wearing one of our many tropical shirts. Victoria wanted a hula outfit and she picked a set out from Shakatime.
With a little planning ahead you parties will flow better.
Wednesday, March 2, 2011
Luau inspired candy bar wrappers
Ok so I was not really fond of the luau candy bar wrappers that I made a while ago. I just reworked it to something that I am happier with. (you can click on it to view it a bit larger)
Monday, February 28, 2011
Miss V's Room Redo baby step #1
Miss V has decided that she would like her room redone. She found some bedding that she likes and I will order that in a few weeks. To make her room seem more cohesive we thought of painting her wood furniture white. Right now it is a natural finish.
Miss V doesn't like huge fast changes. So I figured that I would start with her bookcase. This is what it looked like back on Feb 16.
We stopped at Home Depot that following weekend and picked up some sandpaper, primer and paint. On February 22nd I started my little project.
Before sanding the finish off.
Sanded the finish off and it was a nice light coat so I didn't have to sand very much.
I used a spray primer. In theory it sounded good, but next time, I will just stick with regular primer.
I painted it the next day and put two coats. It is getting a bit humid here is Florida, so my husband brought the bookcase in and we let it completely dry. I keep going back and forth whether I should spray the top with a sealer. Maybe I will see how it goes in the next couple of weeks.
Here is the finished bookcase.
I can't believe how great it came out. It really helps lighten the room. Miss V now cannot wait to have the rest of the room done.
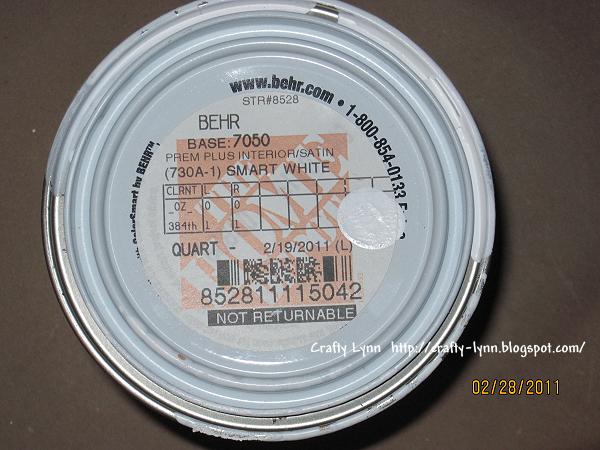
Oh here is the paint info (satin finish)
Miss V doesn't like huge fast changes. So I figured that I would start with her bookcase. This is what it looked like back on Feb 16.
We stopped at Home Depot that following weekend and picked up some sandpaper, primer and paint. On February 22nd I started my little project.
Before sanding the finish off.
Sanded the finish off and it was a nice light coat so I didn't have to sand very much.
I used a spray primer. In theory it sounded good, but next time, I will just stick with regular primer.
I painted it the next day and put two coats. It is getting a bit humid here is Florida, so my husband brought the bookcase in and we let it completely dry. I keep going back and forth whether I should spray the top with a sealer. Maybe I will see how it goes in the next couple of weeks.
Here is the finished bookcase.
I can't believe how great it came out. It really helps lighten the room. Miss V now cannot wait to have the rest of the room done.
Oh here is the paint info (satin finish)
Friday, February 11, 2011
Tropical Goody Bag Labels
I "kind of" go all out when planning parties. Some how this morning I stumbled upon a site that you can find out your name in Hawaiian. How cool is that? Then I made up little labels using quick pages from Gotta Pixel. I am going to print them out to maybe 3 inch x 3 inch and tie them to the goody bags.
If you click on the picture you can see it a little better. So.....what do you think???
Wednesday, January 19, 2011
Digital Scrapbooking and Disney.....
I am a huge traditional paper scrapbooker that is slowly getting into the digital world. I have been in a creative rut lately with my paper scrapbooks. I still haven't scrapped our June 2007 Disney Trip. It wasn't our best trip by far, but still anytime spent at the House of Mouse is good.
I think I hit a wall because since we moved to Florida in February 2005 we took a few trips to see Mickey and Pals, well actually to see the Princesses, Stanley and Goofy. Most of my pages have the same papers, stickers, elements and well that just gets boring.
So last week I some how stumbled upon a whole message board all about Disney Scrapping!!!! It is called Mouse Scrappers.
Yesterday I sat down and of course signed up and started looking through some of folders. By the way, it is layed out right down to the countries of EPCOT and the lands around Magic Kingdom. Some of the pages just blew me away!!! Well some of the pages said to click on the pictures for the credits. When I did, I found a huge shock......Disney inspired digital scrapbook kits!
Maybe that was my problem! I had been searching for Disney digital kits. Duh...light bulb went off in my head. Well of course they can't label them with Disney or character names!
I went through and bookmarked a few of the sites that I call Disney Inspired kits. Here is a list of what I found so far:
ScrapMatters - search for Disney
Sahlin Studio
Cynthia Forever
MJ-AJ Designs
Natalie's Little Corner of the World
Britt-ish Designs
Kellybell Designs
Maybe now I will finally get around to scrapping our June 2007 trip!!!!
I think I hit a wall because since we moved to Florida in February 2005 we took a few trips to see Mickey and Pals, well actually to see the Princesses, Stanley and Goofy. Most of my pages have the same papers, stickers, elements and well that just gets boring.
So last week I some how stumbled upon a whole message board all about Disney Scrapping!!!! It is called Mouse Scrappers.
Yesterday I sat down and of course signed up and started looking through some of folders. By the way, it is layed out right down to the countries of EPCOT and the lands around Magic Kingdom. Some of the pages just blew me away!!! Well some of the pages said to click on the pictures for the credits. When I did, I found a huge shock......Disney inspired digital scrapbook kits!
Maybe that was my problem! I had been searching for Disney digital kits. Duh...light bulb went off in my head. Well of course they can't label them with Disney or character names!
I went through and bookmarked a few of the sites that I call Disney Inspired kits. Here is a list of what I found so far:
ScrapMatters - search for Disney
Sahlin Studio
Cynthia Forever
MJ-AJ Designs
Natalie's Little Corner of the World
Britt-ish Designs
Kellybell Designs
Maybe now I will finally get around to scrapping our June 2007 trip!!!!
Tuesday, January 18, 2011
Tropical/Hawaiian invites
This is the invitation that I made up yesterday with Miss V's help. It actually is a premade page and instead of a picture we put the text in. Obviously I took out the layer that had the personal info. I will print them out on Avery post cards #8387 and she will hand deliver them to her neighbhorhood friends.
Stanley Candy Bar Wrappers
I started this blog not to long ago and forgot to add the Stanley Griff candy bar wrappers. They came out so cute!!
Tropical/Hawaiian Candy Bar Wrappers
So yesterday Miss V decided on her birthday theme this year. She decided on a Tropical theme which is super easy. We found ideas on flip flop cakes and a beachball cake. (yes I know it is only January and her birthday is the end of March. I like planning things way ahead of time and I end up way less stressed by party time)
I used a digital scrapbooking kit from GottaPixel and made her invites and candy bar wrappers. Here is a copy of the candy bar wrapper, it is resized so it is a bit grainy and watermarked with crafty lynn.
I am not sure what color foil yet, but I always order them from FOILMAN.
I used a digital scrapbooking kit from GottaPixel and made her invites and candy bar wrappers. Here is a copy of the candy bar wrapper, it is resized so it is a bit grainy and watermarked with crafty lynn.
I am not sure what color foil yet, but I always order them from FOILMAN.
Saturday, January 15, 2011
Toilet Paper Tube Cupid
I cannot believe I forgot to post this last year! I found the directions on Kaboose. Miss V's class made them last year at their Valentiene's Party.
I made a sample up a few days before.
Cardboard tube
Acrylic paint: flesh (we used a peach color), pink, white, and black
Paint brush
1" strip of white construction paper
1 gold glitter chenille stem
1 red glitter chenille stem
1 silver glitter chenille stem
Pencil
Small scrap of peach felt
2 cotton balls
White craft glue (I also used glue dots)
Scissors
Paint cardboard tube with flesh-colored paint and set aside to dry. When completely dry apply some glue around the bottom of the painted cardboard tube, about an inch up from the bottom. Glue the 1" wide strip of white construction paper around the tube and trim any excess, this is Cupid's diaper.
Bend about 2/3 of the gold chenille stem into a letter "D". Twist to secure and trim the remaining long piece of chenille off to make the arrow, set aside.
Bend the end of the red chenille stem into a small triangle; this will be the point of your arrow. Twist to secure and trim long end off.
Take remaining red chenille and bend the end into a red heart; this will be the back end of your arrow. Twist to secure and trim off excess.
Take the remaining piece of gold chenille that you set aside. Twist one end onto the arrowhead and one end onto the heart.
Lay the bow on the table and glue the arrow across the front of it.
Cut the silver chenille stem in half.
Bend both halves into tear drop shapes and twist the ends to secure.
Unroll two cotton balls. Place some glue on the ends of both cotton balls and attach to the top of the cardboard tube as the hair.
Lay the cardboard tube down on its side, wings sticking out to the left and right. (I found it easier to poke holes in the back and insert the pipe cleaners and bend them inside so that the wings moved a bit.)
Glue the bow and arrow to the front of the cardboard tube. Allow to dry completely. (This is where I used bigger glue dots to save drying time)
Cut two small circles from flesh-colored felt and glue to the front of the bow as the hands. (I didn't have any the day I made the sample)
Use a cotton swab or a roughed up paintbrush to dab some pink paint on for cheeks.
Use the handle end of a paintbrush to dot on two white eyes. Let dry.
When white is dry, dot on black. (For the classroom one's I did use wiggly eyes and used glue dots to attach them with.)
I made a sample up a few days before.
Cardboard tube
Acrylic paint: flesh (we used a peach color), pink, white, and black
Paint brush
1" strip of white construction paper
1 gold glitter chenille stem
1 red glitter chenille stem
1 silver glitter chenille stem
Pencil
Small scrap of peach felt
2 cotton balls
White craft glue (I also used glue dots)
Scissors
Paint cardboard tube with flesh-colored paint and set aside to dry. When completely dry apply some glue around the bottom of the painted cardboard tube, about an inch up from the bottom. Glue the 1" wide strip of white construction paper around the tube and trim any excess, this is Cupid's diaper.
Bend about 2/3 of the gold chenille stem into a letter "D". Twist to secure and trim the remaining long piece of chenille off to make the arrow, set aside.
Bend the end of the red chenille stem into a small triangle; this will be the point of your arrow. Twist to secure and trim long end off.
Take remaining red chenille and bend the end into a red heart; this will be the back end of your arrow. Twist to secure and trim off excess.
Take the remaining piece of gold chenille that you set aside. Twist one end onto the arrowhead and one end onto the heart.
Lay the bow on the table and glue the arrow across the front of it.
Cut the silver chenille stem in half.
Bend both halves into tear drop shapes and twist the ends to secure.
Unroll two cotton balls. Place some glue on the ends of both cotton balls and attach to the top of the cardboard tube as the hair.
Lay the cardboard tube down on its side, wings sticking out to the left and right. (I found it easier to poke holes in the back and insert the pipe cleaners and bend them inside so that the wings moved a bit.)
Glue the bow and arrow to the front of the cardboard tube. Allow to dry completely. (This is where I used bigger glue dots to save drying time)
Cut two small circles from flesh-colored felt and glue to the front of the bow as the hands. (I didn't have any the day I made the sample)
Use a cotton swab or a roughed up paintbrush to dab some pink paint on for cheeks.
Use the handle end of a paintbrush to dot on two white eyes. Let dry.
When white is dry, dot on black. (For the classroom one's I did use wiggly eyes and used glue dots to attach them with.)
Monday, January 10, 2011
Valentine/girly freebie!!
I was just searching for digi Valentine Freebies scrapbook kits and stumbled upon this site. It is called Delicious Scrap Shop. For January there are two really cute freebie kits. I just downloaded them and unzipped them. I can't wait to used them later today or tomorrow.
I think my favorite of the two is the PinkALicious kit. I have some really cute pics of Miss V from last Valentine's Day that would go perfect with this kit.
Thursday, January 6, 2011
Digital Scrapbook Stuff
I am hopping into the world of digital scrapbooking. Oh I will never totally give up my paper books though. I am working on some things for Miss V and will either print them out, from this site or put them in a photo book.
Here are some sites that I have found freebie kits yesterday.
Peppermint Creative
Free Digital Scrapbooking
Shabby Princess
Digital Freebies
Scrap Girls
Digital Scrapbooking Freebies
Digi Scrappers Corner
Cottage Arts
Digital Divas Designs
Computer Scrabook (this one has lots of freebies)
If you know of more, please leave me a comment with the link. Thanks!
Here are some sites that I have found freebie kits yesterday.
Peppermint Creative
Free Digital Scrapbooking
Shabby Princess
Digital Freebies
Scrap Girls
Digital Scrapbooking Freebies
Digi Scrappers Corner
Cottage Arts
Digital Divas Designs
Computer Scrabook (this one has lots of freebies)
If you know of more, please leave me a comment with the link. Thanks!
Tuesday, December 28, 2010
Reindeer Food 2010
Here is the new poem label that I created this year for Magic Reindeer Food. I designed it in PaintShopPro8 and the orignial size is 1524X1524. For this since they are kind of small you can paste the picture into a word doc many times and print them on card stock. Cut them out and staple them onto snack size ziplock bags. The digital kit is called Santa's Workshop and can be found at GottaPixel.
Ingredients:
1 cup rolled oats
2-6 Tbsp red colored sugar
2-6 Tbsp. green colored sugar
1 - 2 Tbsp glitter
Preparation:
Mix the ingredients together and place in a plastic bag, adding as much colored sugar as you like for a festive effect.
Sprinkle this reindeer food outside tonight.
The moonlight will make it sparkle bright.
As the reindeer fly and roam.
This will guide them to your home.
Enjoy!
Ingredients:
1 cup rolled oats
2-6 Tbsp red colored sugar
2-6 Tbsp. green colored sugar
1 - 2 Tbsp glitter
Preparation:
Mix the ingredients together and place in a plastic bag, adding as much colored sugar as you like for a festive effect.
Sprinkle this reindeer food outside tonight.
The moonlight will make it sparkle bright.
As the reindeer fly and roam.
This will guide them to your home.
Enjoy!
Snowman Soup 2010
Miss V wanted to make her classmates Snowman Soup again this year and two for her teachers. I came up with two different designs. I create them in PaintShopPro8. The orginal size are 2032x2032. I print them on Avery Postecards #8387.
Here is the "recipe" for Snowman Soup
The recipe for Snowman Soup:
1 individual pack hot chocolate mix
3 Hershey's chocolate kisses
10-15 mini-marshmallows
1 Candy Cane
Place all in a pretty Christmas clear ziplock bag or "goody" bag. Attach the poem with a festive ribbon.
The first one is the one I designed from the Snow Fun Kit on Gottapixel. This one was for her classmates.
For the two teachers, I found plain white ceremic mugs at Target for $1.99 each. I also picked up Snowman Gift bags in the $1.00 spot. For the kids I just used small paper snowman goodie bags and stapled the poem to the fronts.
Here she is with all her Snowman Soup gifts. (for her own protection I did block out her face)
Here is the "recipe" for Snowman Soup
The recipe for Snowman Soup:
1 individual pack hot chocolate mix
3 Hershey's chocolate kisses
10-15 mini-marshmallows
1 Candy Cane
Place all in a pretty Christmas clear ziplock bag or "goody" bag. Attach the poem with a festive ribbon.
The first one is the one I designed from the Snow Fun Kit on Gottapixel. This one was for her classmates.
This is the one I designed for the teachers, it was from the Winter Frost Kit at Gottapixel.
The poems are a little different at the beginning.
For the two teachers, I found plain white ceremic mugs at Target for $1.99 each. I also picked up Snowman Gift bags in the $1.00 spot. For the kids I just used small paper snowman goodie bags and stapled the poem to the fronts.
Here she is with all her Snowman Soup gifts. (for her own protection I did block out her face)
Christmas Pageant Angels
I volunteered to help make costumes for our Church's Christmas Pageant this year. I used the same McCall's Pattern 2854 as Miss V's Trixie the Halloween Fairy costume. I did make them in the full length. I also used a pretty white crushed panne' velvet. It wasn't a stark white, but more of a winter white. I ended up making five Angels with this pattern. At the last minute one of the girls had to switch and be a Wiseman. For the wings and halo, they were purchased through Buy Costumes.
For Gabriel's costume I used Simplicity 4797 pattern since the young lady playing him was a bit older and taller. I made the dress and put gold trimming on the bottom of the dress and down the sleeves. For her belt I used a gold twisted rope. The wings and halo also came from Buy Costumes, but a different style.
Here is a close up of the gold trimming. It was very pretty.
I totally forgot how that I love to sew simple things. I even told Miss V that I found a pattern to make pajama pants and she wanted of course MONKEY ones. On one trip through Joann's she found every single fabric that had monkeys on it.
For Gabriel's costume I used Simplicity 4797 pattern since the young lady playing him was a bit older and taller. I made the dress and put gold trimming on the bottom of the dress and down the sleeves. For her belt I used a gold twisted rope. The wings and halo also came from Buy Costumes, but a different style.
Here is a close up of the gold trimming. It was very pretty.
I totally forgot how that I love to sew simple things. I even told Miss V that I found a pattern to make pajama pants and she wanted of course MONKEY ones. On one trip through Joann's she found every single fabric that had monkeys on it.
Wednesday, October 20, 2010
Wanted posters
This year we are hosting a murder mystery game called Murder At The Deadwood Saloon. No wild west party would be complete without a few wanted posters. I searched high and low online and found a software program called Poster Forge. You can download the free version and start creating! It also has a couple other features, but I stuck with the wanted posters.
When you print them out, they print out on 4 letter size sheets of paper. I used white cardstock to print mine out on. I have four printed and just put two together. It was so simple!
Here are the two that I just finished, I did blank out my daughter's face and name for her own online safety.
I also search for cute slang sayings for the "crimes" part of the poster. The finished hight is about 20 inches.
When you print them out, they print out on 4 letter size sheets of paper. I used white cardstock to print mine out on. I have four printed and just put two together. It was so simple!
Here are the two that I just finished, I did blank out my daughter's face and name for her own online safety.
I also search for cute slang sayings for the "crimes" part of the poster. The finished hight is about 20 inches.
Monday, October 4, 2010
Monday, September 27, 2010
Tall Ghost, cost $12.00
This year I am looking to make some inexpensive decorations. I saw some tomato cage ghosts and thought, I can do that and make it taller!
I picked up a Styrofoam ball (10.00) and a package of orange string lights, 50 (2.00) at walmart yesterday.
First, tip the tomato cage upside down and push the Styrofoam ball on the ends.
This one comes up to my shoulders, so around 4 foot.
I picked up a Styrofoam ball (10.00) and a package of orange string lights, 50 (2.00) at walmart yesterday.
First, tip the tomato cage upside down and push the Styrofoam ball on the ends.
Next, take your string lights, can be any color and zip tie them to the cage.
I then zip tied the cage to an unused plant stand.
Added some white fabric that I had in a bin or you could use a twin sheet. Use black permanent marker to make the eyes and mouth. To give him a neck, I used some clear stretchy jewelry cording and tied it around his neck or you could use fishing line or white thread.
Plug in and enjoy your new friendly ghost!
Friday, September 24, 2010
Trixie the Halloween Fairy bag
Of course you can't have a really cool costume without a really cool trick or treat bag. So I found a 3 pack of canvas tote bags at Walmart. They are 13.5 x 13.5 x 3.5 inches, perfect!
I printed out Trixie on an iron on transfer page. I used the one for dark fabrics because I wanted the white background.
Then around the edges I used some bright orange grosgrain ribbon and glued it on with Fabri-tac. The corners looked a bit messy so I whipped out my box of scrapbooking flowers. I found a pretty orange flower from CK and glued those on. Now what for the center....I have plenty of brads, but didn't want to poke holes into the bag so I found some mini pom poms left over from a Christmas craft and voila....
A pretty trick or treat bag for my little Trixie.
Isn't it cute? What do you think???
I printed out Trixie on an iron on transfer page. I used the one for dark fabrics because I wanted the white background.
Then around the edges I used some bright orange grosgrain ribbon and glued it on with Fabri-tac. The corners looked a bit messy so I whipped out my box of scrapbooking flowers. I found a pretty orange flower from CK and glued those on. Now what for the center....I have plenty of brads, but didn't want to poke holes into the bag so I found some mini pom poms left over from a Christmas craft and voila....
A pretty trick or treat bag for my little Trixie.
Isn't it cute? What do you think???
Subscribe to:
Posts (Atom)